Getting Started: Tips for a Smooth Start
Welcome on board! We’re thrilled to support you in unlocking the full potential of our innovative online classroom. Whether you’re new to the platform or refreshing your knowledge, this guide will help you create engaging and dynamic learning experiences for your students.
Important Reminder ⏰: To ensure a smooth and effective session, we highly encourage both tutors and students to join the class on time. Our system allows you to join up to 5 minutes before the scheduled start time (for example, if your class is booked for 10:00 AM Europe/London time, you can join as early as 9:55 AM). Sessions will finish promptly on time, and the platform will provide prompts notifying you and your students when the class is about to end. Joining on time helps everyone get the most out of their session without interruptions.
Pro Tip 💡: For the best tutoring experience, we highly recommend conducting your sessions via a laptop or preferably a desktop with a larger screen. Teaching via smartphone may limit functionality and reduce the immersive experience for both you and your students.
1. Setting Up Your Video and Audio
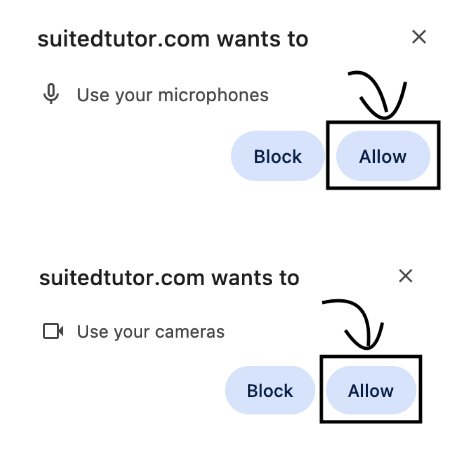
- Enable Permissions: Before you begin your virtual session, you'll need to enable from your currently open browser, e.g. Google Chrome, your 'camera' and 'microphone' prompts, by simply selecting the "allow" button. This step ensures that you're visible and audible to your students.
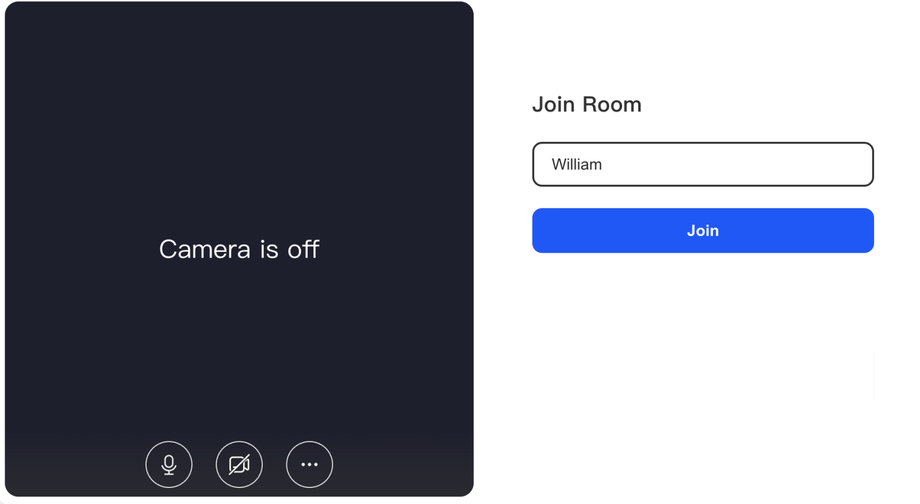
- Edit Your Name: If needed, you can always amend/update your full name before starting the session.
- Join the Session: Once everything is set, click the "Join" button, to enter the online classroom.
2. Activating and Disabling Your Microphone and Camera
During your session, you may decide to mute your microphone or turn off your camera.
- Microphone: Click the "microphone" icon to toggle between mute and unmute.
- Camera: Similarly, click the "camera" icon to turn your video on or off as needed.
3. Sharing Your Screen
Sharing your screen allows you to present a wide range of options, such as slides, documents, or other resources directly to your students.
- Start Screen Sharing: Click on the 'Share Screen' button. You'll be prompted, (for instance from the Google Chrome browser), to choose whether you wish to share your entire screen, a specific window, or a browser tab.
- Stop Screen Sharing: Simply click the 'Stop Sharing' button when you're done.
4. Using the Whiteboard Feature
The whiteboard is a powerful tool for illustrating concepts and working through problems in real-time.
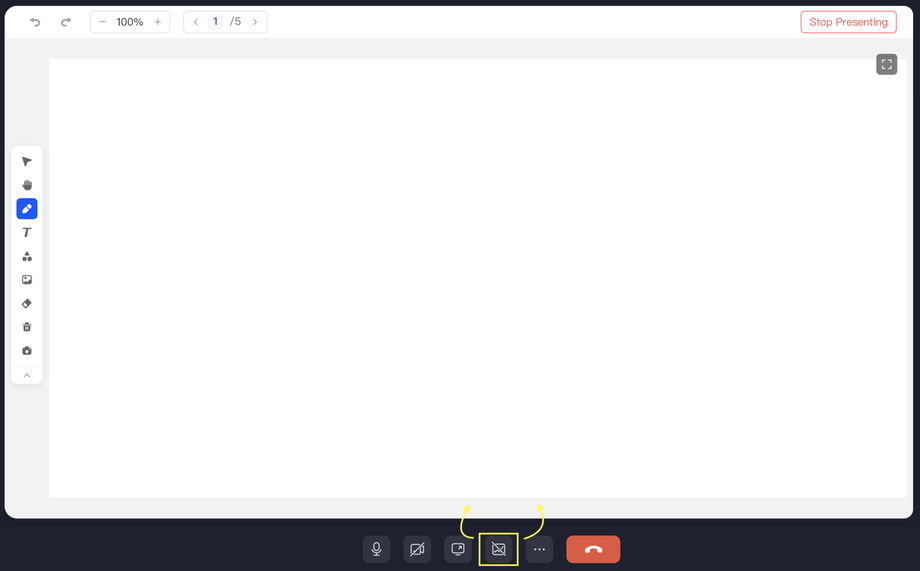
- Access the Whiteboard: Click on the 'Whiteboard' icon in the classroom interface. You can draw, write, and annotate directly on the whiteboard.
- Clear or Save Content: Clear the board, by selecting the 'bin' icon, when needed, or you can save your work, by selecting the 'digital camera' icon for future reference.
Tip 💡: When sharing your whiteboard as a tutor, please note that uploading photos or files directly onto the whiteboard may not be supported. To work around this limitation, you can share your screen to display images or documents to your students.
In addition, to make your lessons even more seamless and interactive, we’ve compiled a list of complementary cutting-edge tools, designed specifically for tutors, to enhance engagement and collaboration during your sessions. You can find the full list here.
5. Interacting with Room Members
Stay connected with your students throughout the session by previewing and accessing room members.
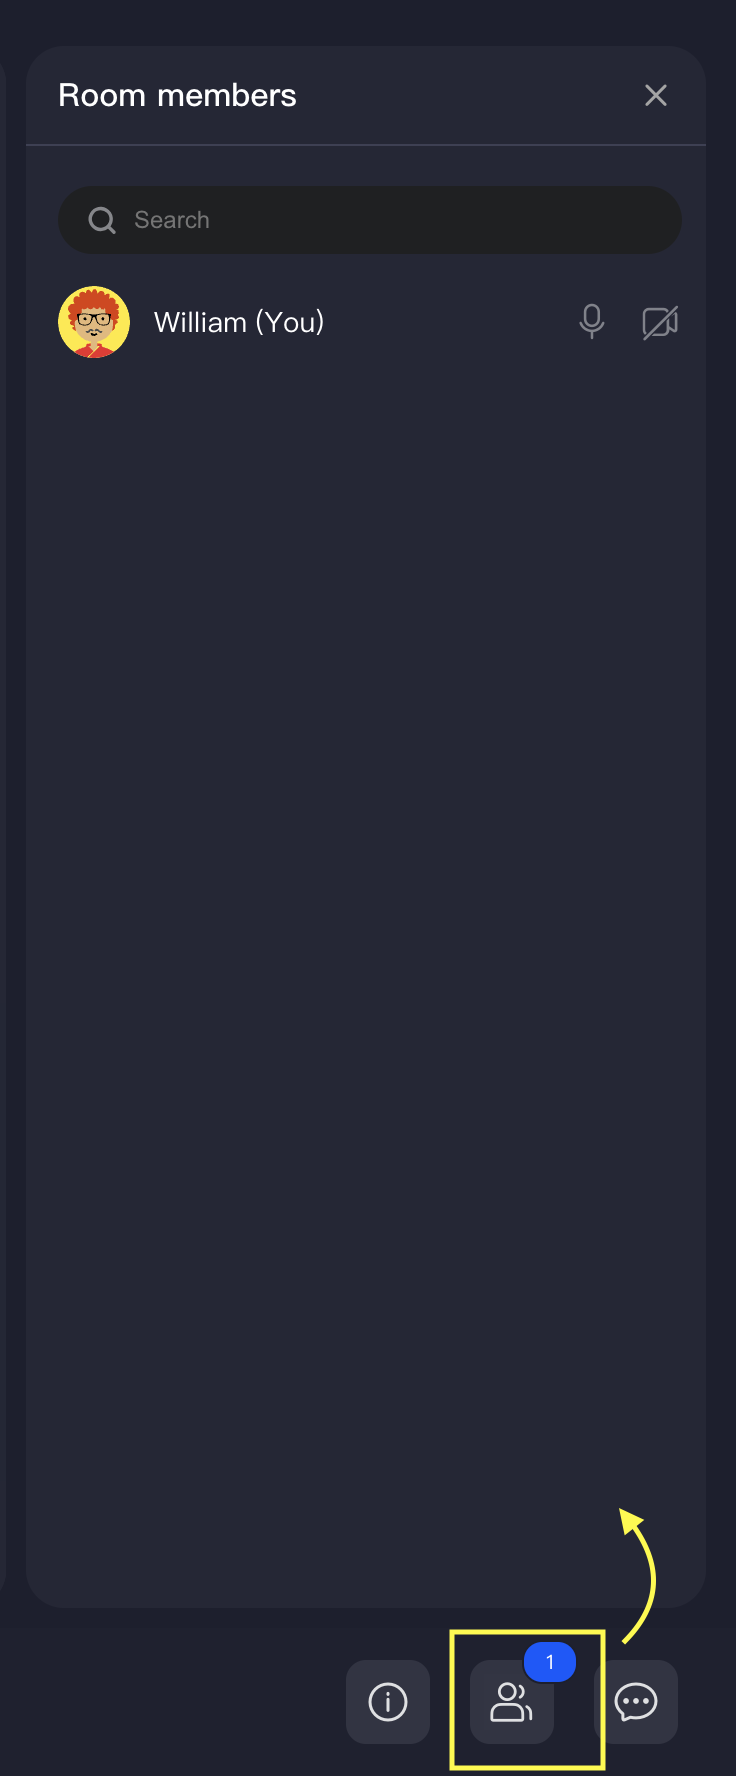
- Preview Members: Click on the 'Room Members' icon to see a list of participants.
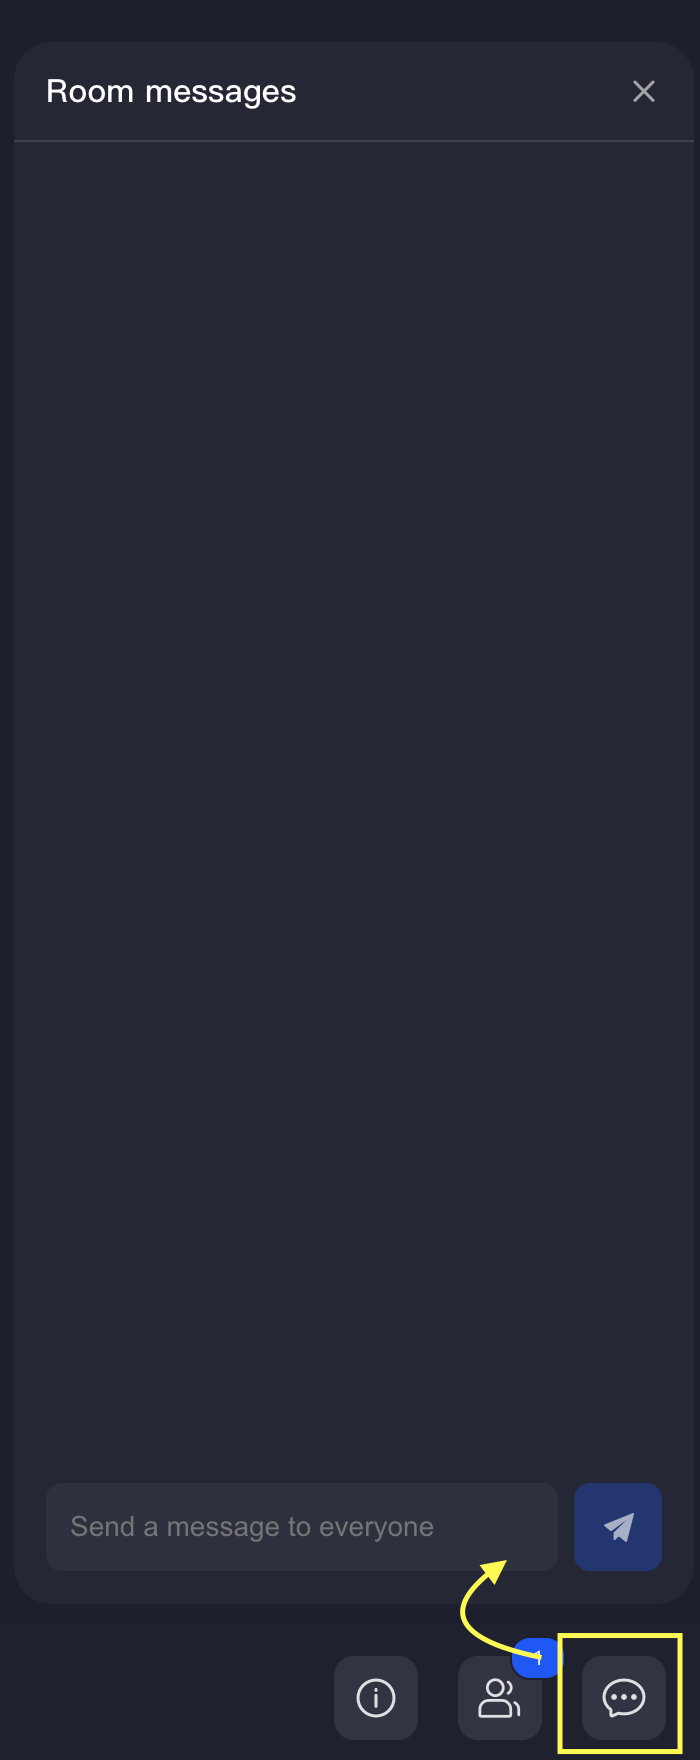
- Chat with Members: You can also send messages via the chat feature, by clicking on the 'Chat' icon.
6. Ending the Session
When your session is complete, it's important to end the video call properly.
- Terminate the Session: Click on the 'End Call' button, filled with red colour, to close the session for all participants.
7. Enhance Engagement with Google Chrome Extensions
To elevate your online teaching experience, we've curated a list of highly interactive Google Chrome extensions. These tools are free to use and will take your classroom engagement and collaboration to the next level! Please make sure to check out these fantastic and very promising options, to enhance the effectiveness of your educational sessions.
Final Thoughts
At Suited Tutor, we want your teaching experience to be as seamless and enjoyable as possible; that's why we've put together a video walkthrough, found below, designed to quickly get you up to speed and refresh your memory - on everything you've learned so far. Please see below 👇 for more:
By familiarising yourself with these features, you'll be well-prepared to deliver high-quality, engaging lessons that your students will love. Happy teaching!!


