We’re excited to unveil Suited Tutor’s internal messaging platform! Designed to simplify communication and enrich your tutoring experience. With a range of innovative features, it will make interacting with parents, students, and fellow tutors easier and more enjoyable. Here’s a comprehensive guide to help you get started with all the fantastic features our messaging platform has to offer!
1. Starting Real-Time 1:1 Interactions
How to Initiate a 1:1 Chat:
- Step 1: Log in to your Suited Tutor account and navigate to the messaging section from the main dashboard. (Please refer to the left-hand panel and locate the "Messages" option).
OR (click or tap on the chat/messaging icon)
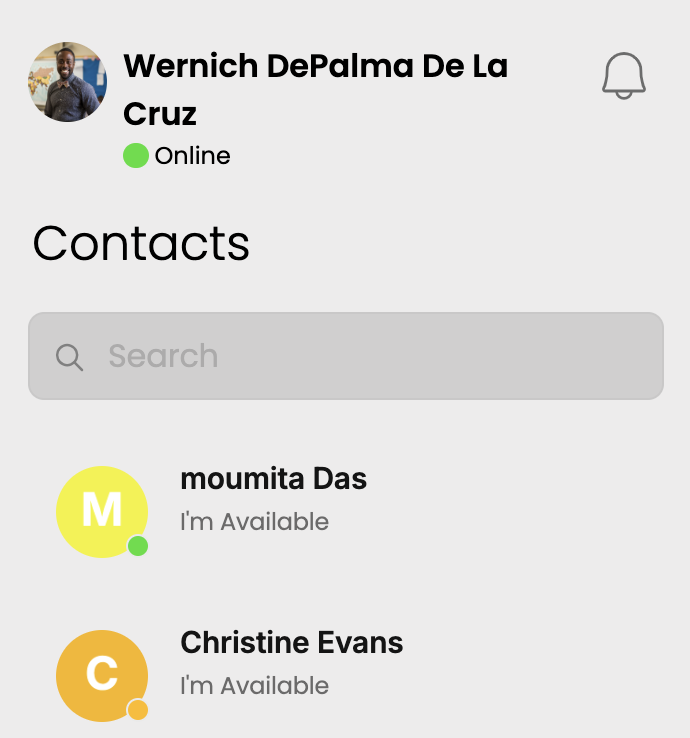
- Step 2: From the bottom left-hand side of the menu, you can click on the “Chats” button, (represented by a chat icon), the "Contacts" button, (indicated by a pupil icon) or the "Groups" button (marked by a people icon).
- Step 3: Choose the contact you want to chat with from your list, or type their name to start a conversation.
- Step 4: Once you have selected the contact you would like to interact with, then please type your message in the text box and hit “Send”.
This allows you to instantly communicate with parents or students, whether you're clarifying lesson details or answering any of their questions.
Note: Here, you will find clear guidelines on what is appropriate and completely inappropriate to share with your students and their parents.
2. Creating Private Chat Groups
How to Set Up a Group Chat:
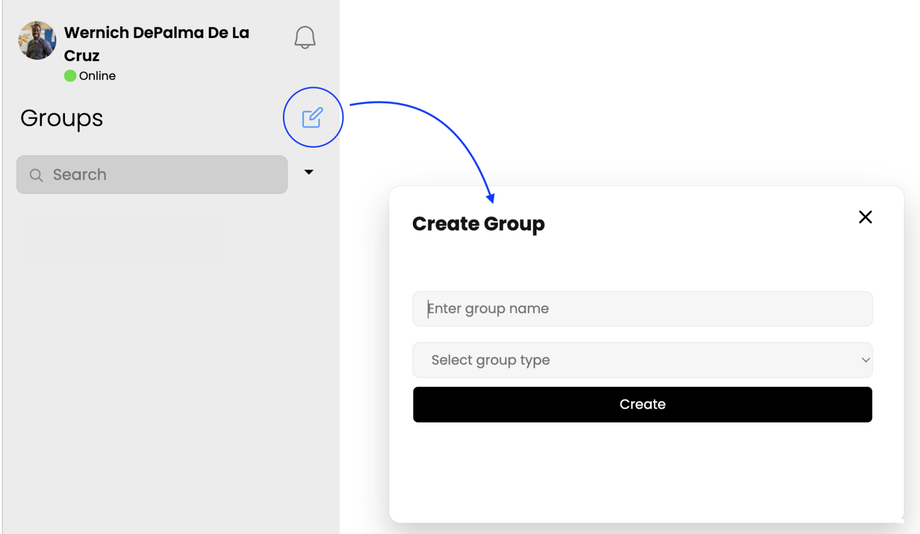
- Step 1: Go to the messaging section and select the "Groups" button, (marked by a people icon).
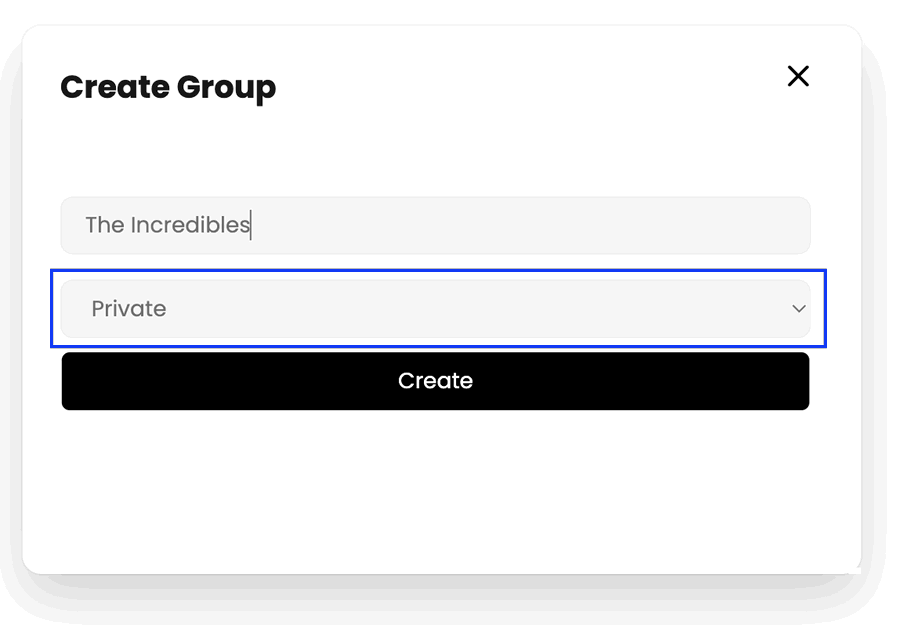
- Step 2: From the 'pencil' icon from your profile - located below the 'bell' icon, please enter the group name
AND (select from the 'group type') 'Private'
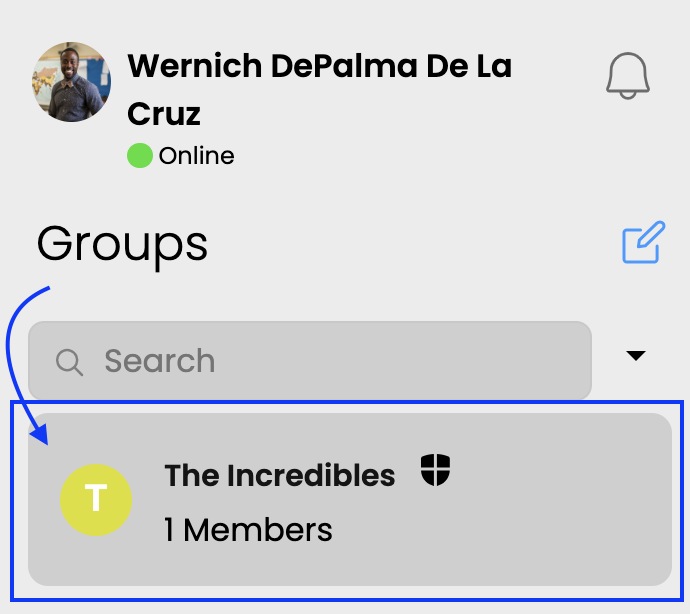
- Step 4: Once the private group chat is created, you can start discussing lesson plans, scheduling classes, sharing updates and many more with your students.
Private group conversations help keep conversations discreet and organised, as well as ensure everyone is involved.
3. Sharing Files
How to Share Files in Chat:
- Step 1: Open the chat discussion(s) where you would like to share a file.
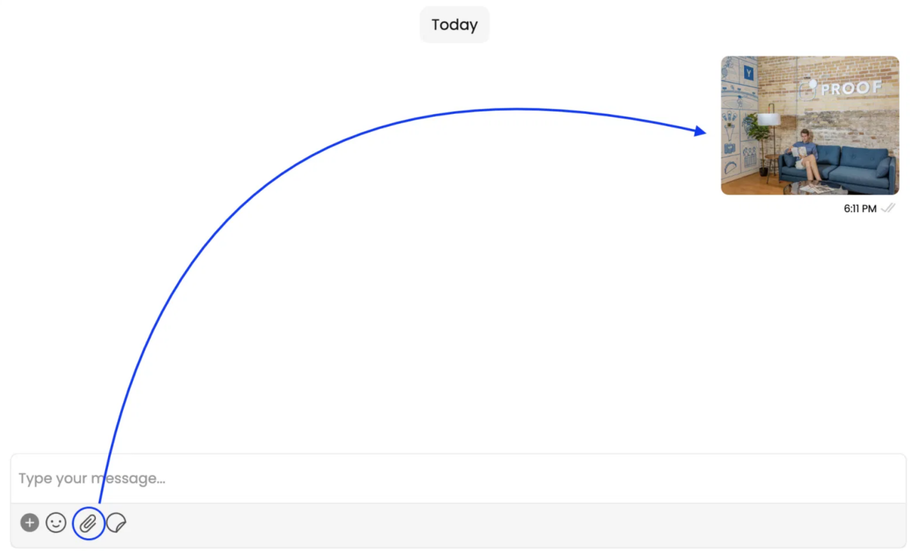
- Step 2: Click on the “paperclip” icon, to attach a file.
- Step 3: Select the file from your device (up to 1 MB) and click “Send” (or press the 'enter' keystroke).
Share homework, study materials, and important documents directly within the chat for easy access.
Note: If you need to share files with your students and their parents that exceed the 1 MB file size limit, you may consider using the following alternative solutions.
4. Using Rich Messaging (Texting) Options
How to Add Emojis and Stickers:
- Step 1: Open any chat window.
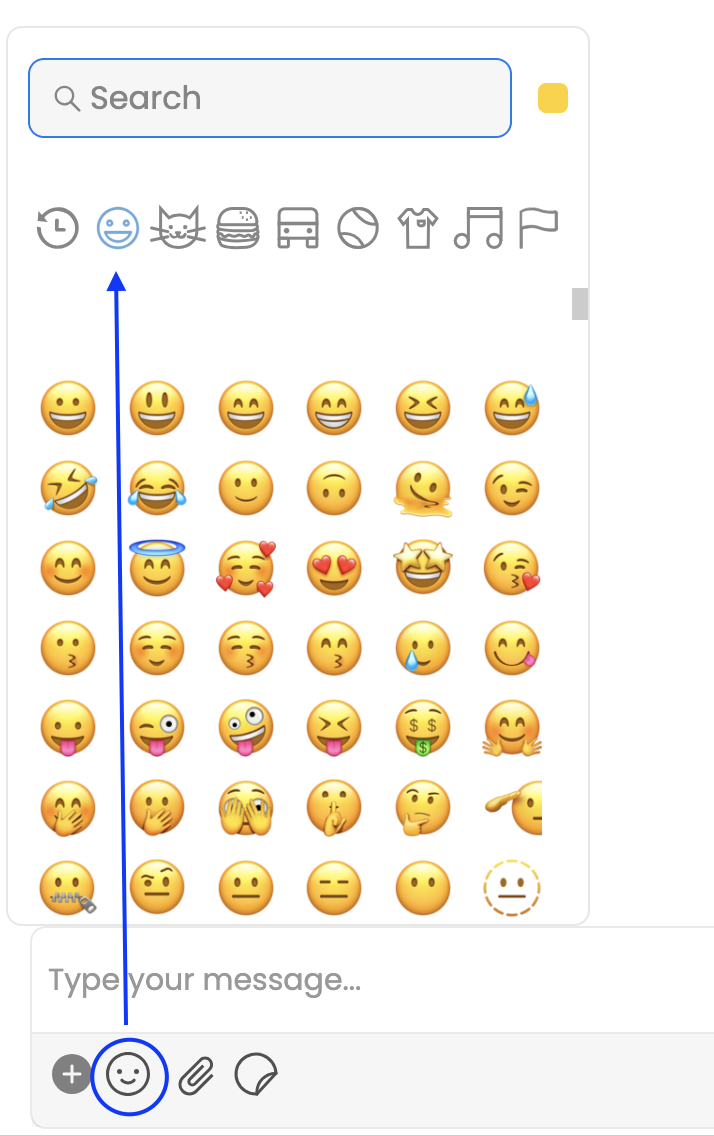
- Step 2: Click on the "emoji" icon located in the text box area.
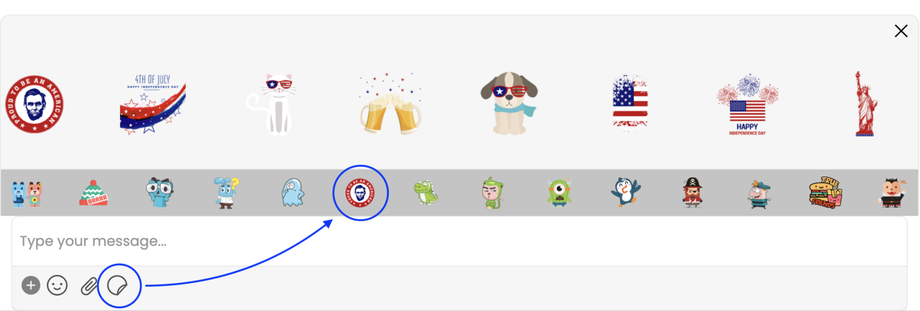
- Step 3: Next to the 'paperclip' icon, (from the right-hand side), click on the "stickers" icon and select the 'sticker' you would like to send.
- Step 4: You can always browse through other available 'sticker' options and select the one you would like to include in your message(s). Don't forget to hit “Send”.
Emojis and stickers add a personal touch and can make interactions more engaging.
5. Previewing Chat History and Notifications
How to Access Chat History and Notifications:
- Step 1: Click on the relevant 'Chats', 'Contacts' or 'Groups' icon from the messaging area.
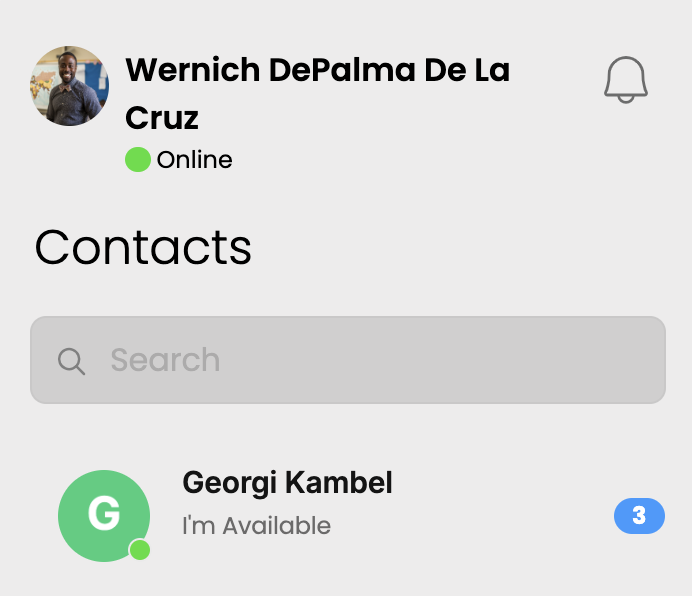
- Step 2: Scroll up or down to view previous messages, or use the 'Search' bar to locate the student or contact, you wish to chat with. (At times, you may notice a 'number' displayed. This indicates the count of unread messages).
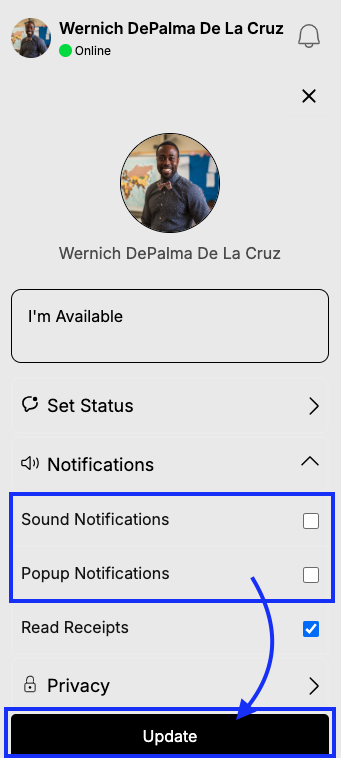
- Step 3: If you want to enable notifications to stay updated and keep track of conversations, please go to your profile, and below the 'Set Status' option, find 'Notifications.' From the dropdown, tick (✔️) the ''Sound Notifications'' and ''Popup Notifications'', and please don't forget to select/click the "Update" button.
6. Managing Status Updates
How to Update Your Status:
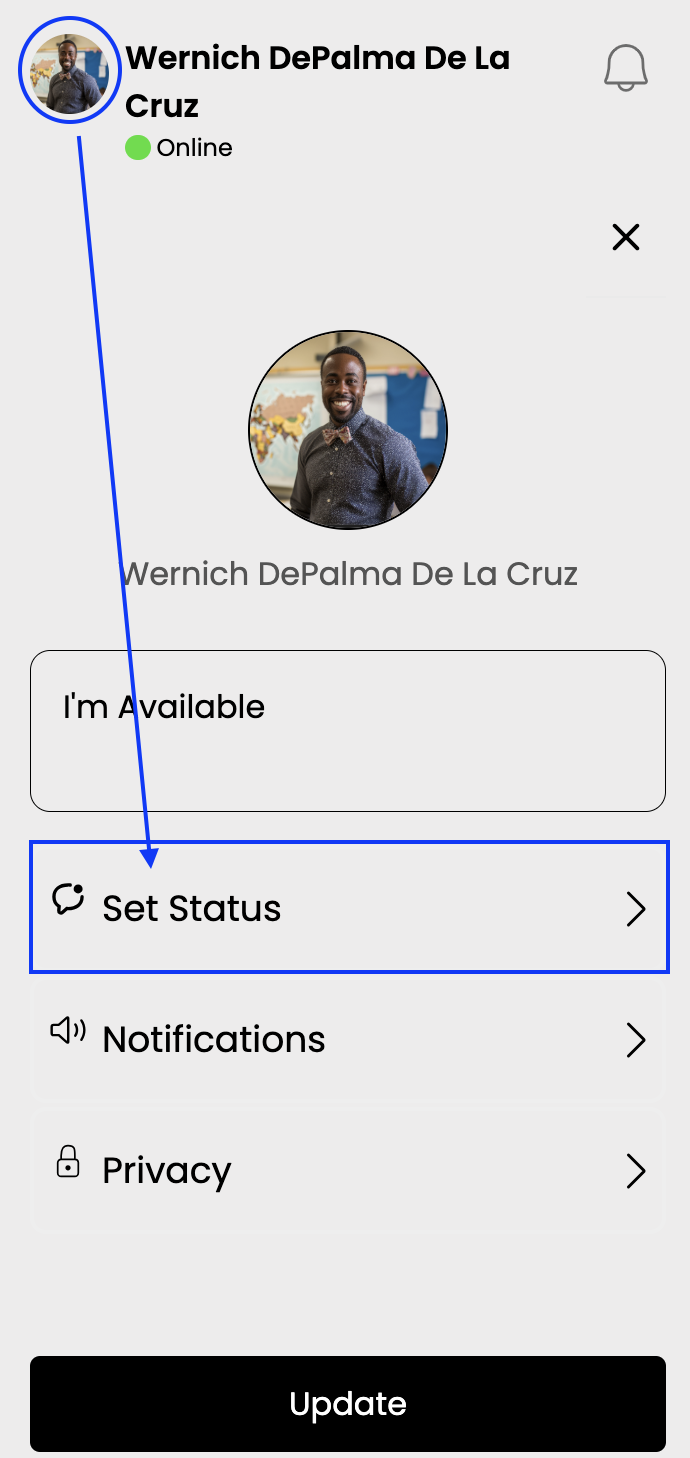
- Step 1: In the message area click on your 'profile picture'.
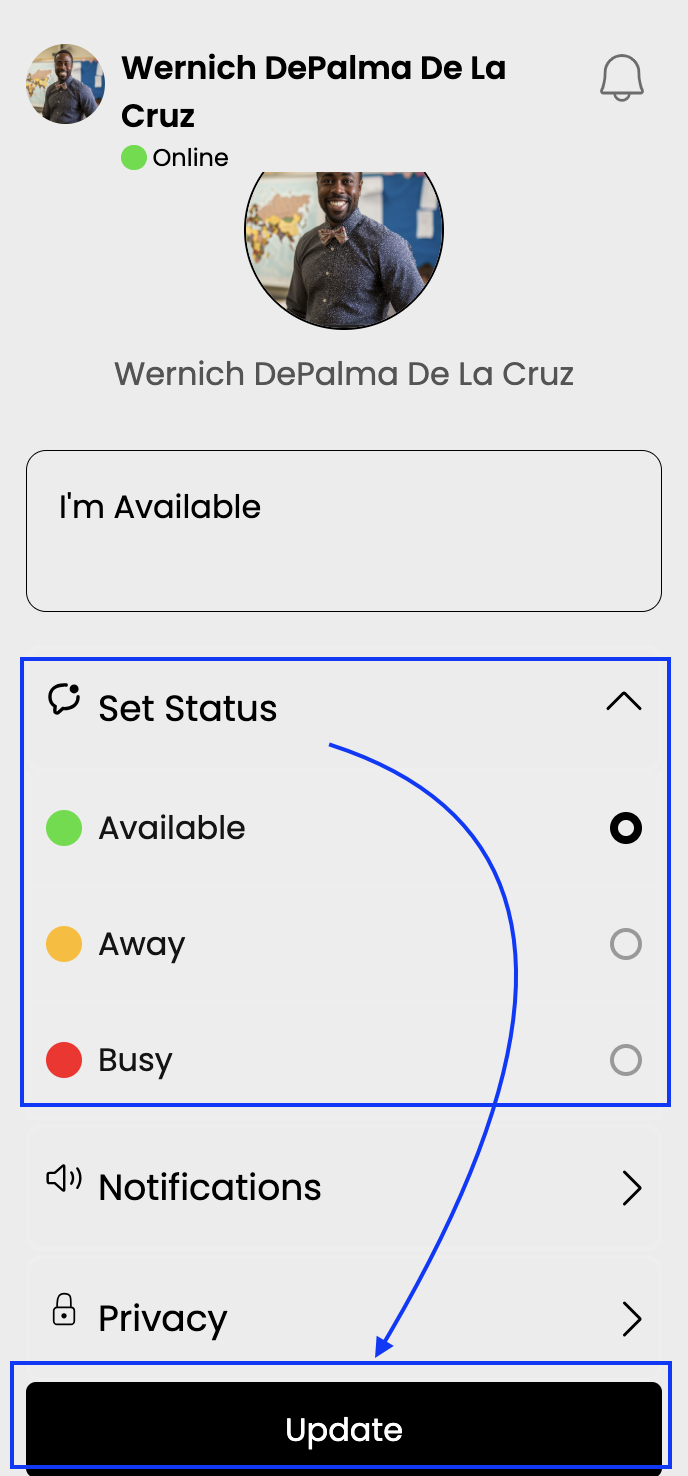
- Step 2: From the list of shown settings - select the "Set Status" option.
AND select one of the following status options: “Available” (online and active), “Away”(offline or inactive), or “Busy” (occupied with other tasks or tutoring).
- Step 3: After selecting the relevant status option, please don't forget to select/click the "Update" button.
This helps manage expectations and lets others know about your availability.
7. Tracking Read Receipts and Last Seen
How to Check Read Receipts and Last Seen:
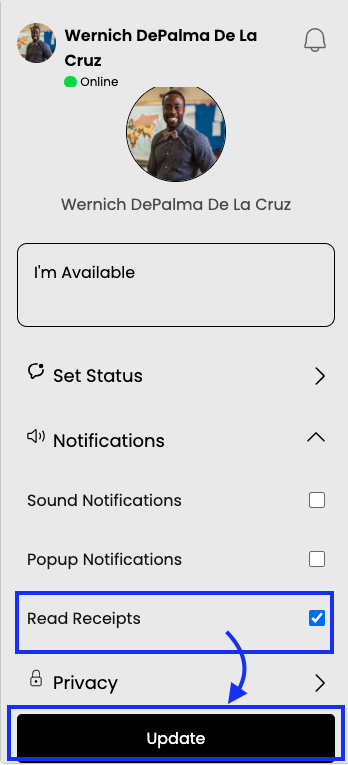
- Step 1: Preliminary step: From your 'profile', ensure that the ''Read Receipts'' box in the 'Notifications' section is ticked(✔️).
- Step 2: Open any chat window from your existing contacts.
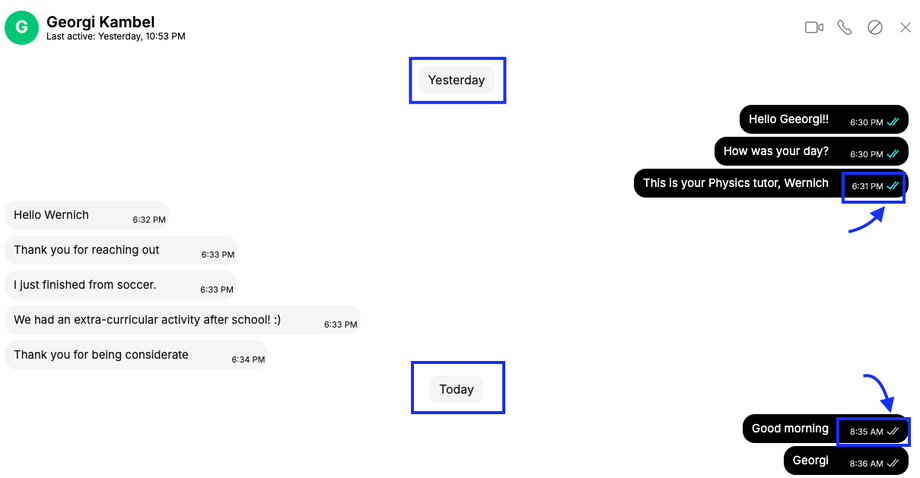
- Step 2: Look for the small check marks (✔️) or timestamps next to your messages to view read receipts. 'Light blue' check marks indicate that the message has been read, while 'white' check marks show that it has been successfully sent, but not yet read by the recipient.
- Step 3: Review the contact's profile for any past or 'historic' messages to check their last activity, such as "yesterday" or "today."
These features can help you gauge engagement effectively and follow up as needed.
Get Started Today!
Suited Tutor's messaging platform is designed to simplify and enhance your communication. Explore these features today and discover how they can elevate your tutoring experience to the next level!
If you have any questions or need further assistance, our support team is here to help!
Happy tutoring! 🎓


